
Many iPhone users have met the same problems. Don't worry because it's probable to restore all your data from your iPhone. Actually, your call history has not yet permanently removed from your iPhone. They are present in some corner of your iPhone waiting for you to pull them out. How? Just use iPhone Data Recovery!
iPhone Data Recovery is a reliable data recovery tool that can efficiently help your restore data (pictures, videos, calendar, call logs, contacts, etc) from your iPhone. No matter how did you lose your data, device damage, accidental deletion, virus inflection, system error, formatting, etc, trust me! iPhone Data Recovery can help you easily recover them without any damage.
Do not hesitate and miss this chance! Download the trial version to save your call logs now.


Part 1: Directly Recover Call History from iPhone
Step 1 Connect device to PC & Choose recovery mode
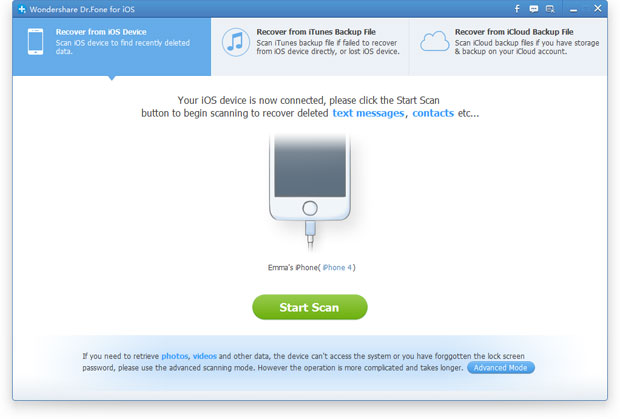
Free download iPhone Data Recovery, install and launch it. Connect your iPhone to your computer via USB. Then you'll see three recovery modes in the interface as the image shows below. Choose "Recovery from iOS Device". After that, click "Start Scan" to scan information of your iPhone.
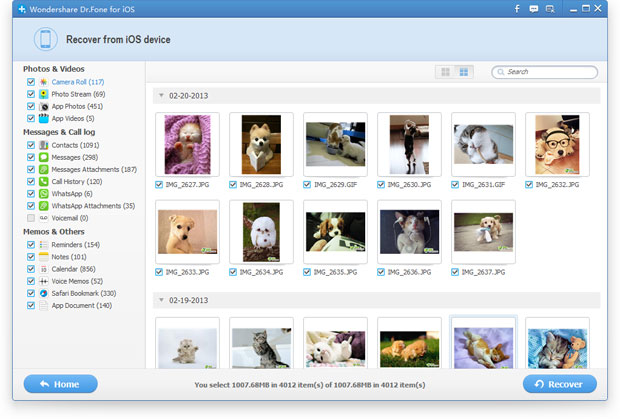
After a while, when scanning is completed, you'll see all contents of your iPhone are list in the next window. You can slide the button at the top of the window to "On" for only displaying the missing items so that you can easily find out your lost call history. Preview the items and recover those you need by clicking "Recover" button.
iTunes itself does not allow you to selectively restore data from it. All or nothing, it means you can either restore everything from iTunes backup files or restore nothing from it. It's quite inconvenient for users. With this in mind, iPhone Data Recovery enable users to choose whatever they want from iTunes backup file and save them to their devices. Follow the steps:
Step 1 Choose recovery mode & Extract iTunes backup file
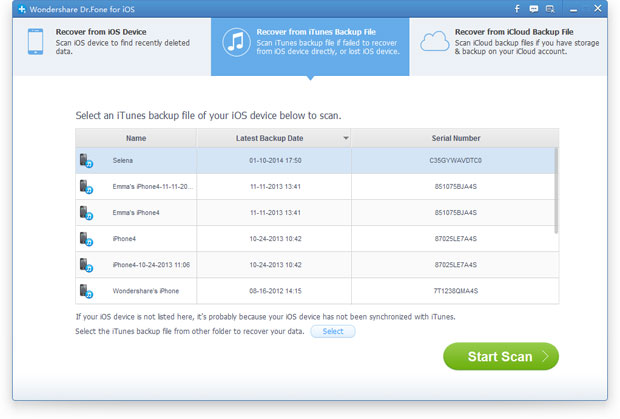
Launch iPhone Data Recovery on your computer and choose "Recover from iTunes Backup File". Here you'll see all iTunes backup files for your iOS devices. Choose the one for your iPhone and click "Start Scan" to extract it. If there is more than one, choose the one with the latest date.
Step 2 Preview & Recover iPhone call log from iTunes backup
Wait for a while until all contents appear in the window. Now you can choose "Call History" in the left column and preview them. Tick the item you want to keep and save it to your computer by clicking the "Recover" button.

Without iPhone Data Recovery, if you want to recover data from iCloud backup, you will meet the same problem as from iTunes backup. iCloud restrains you from previewing or selective restoring specific data from its backup files. Likewise, you need iPhone Data Recovery to help you extract data out of iCloud backup files. Now follow the bellowing steps:
Step 1 Run the program & Sign in your iCloud account
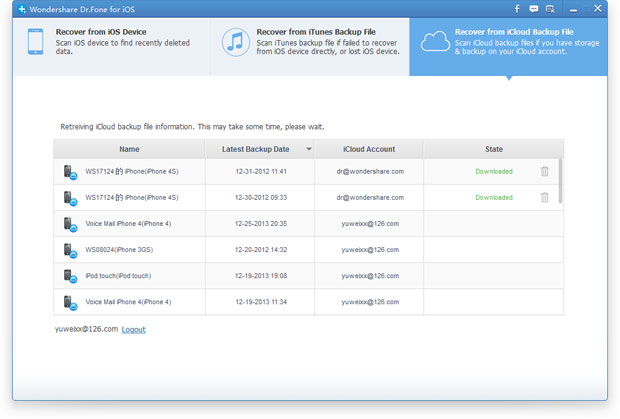
Launch the program after installing it and switch to the third recovery mode as the screenshot below shows "Recover from iCloud Backup". Then log in your iCloud by entering Apple ID and password.
Note: It's safe to log in your account in this interface because iPhone Data Recovery will not record or divulge any information.
Step 2 Download & Scan the iCloud backup
After logging in iCloud, iPhone Data Recovery can detect and list all of your iCloud backup files in the window. Select the one you need and click "Download" button. The downloading process will take you a few minutes.
Note: The downloaded file is only located on your computer. There is no record in the program or any other place.
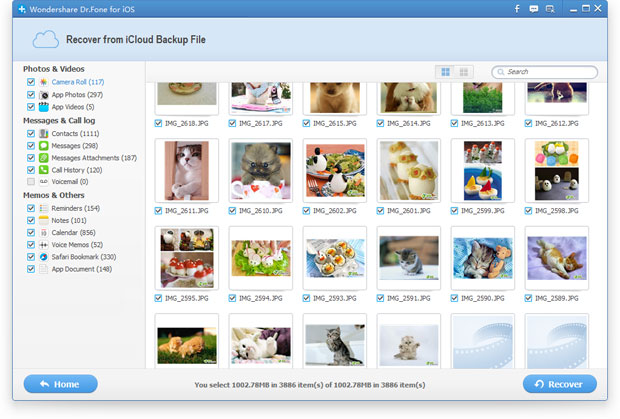
As the following screenshot shows, all of the contents are itemized in the left pane of the window so that you can preview most of them. Then choose those you need and click "Recover" to retrieve your call logs.
---------------------------------------------------------------------------------
More related articles:
How to Permanently Erase Data from iPhone Before Selling
No comments:
Post a Comment